
Are Energy Balls Healthy? Let’s Break It Down
Energy balls have gained a reputation as a clean, nutritious snack—but are they really that healthy? When made with real ingredients like oats, nuts, and seeds, they can offer a great mix of fiber, protein, and natural energy. Unlike many store-bought snacks, homemade versions skip the artificial stuff and focus on whole foods. In this guide, we’ll explore what makes energy balls a smart choice—and when they’re not.
Print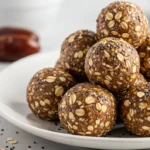
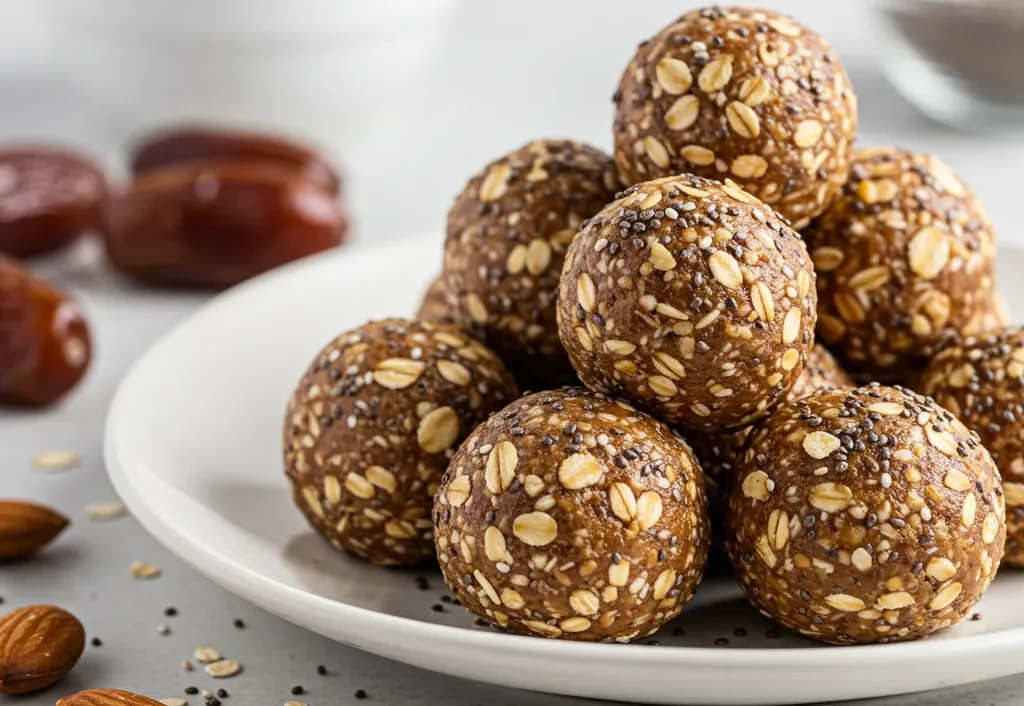
Homemade Energy Balls
- Total Time: 10 minutes
- Yield: 12–15 energy balls
- Diet: Gluten Free
Description
These homemade energy balls are a nutritious, no-bake snack packed with healthy fats, fiber, and natural sweetness. Made with oats, dates, nut butter, and chia seeds, they provide a boost of energy without refined sugar. Perfect for meal prep, pre-workout fuel, or a healthy dessert, these bites are customizable with your favorite add-ins like chocolate chips, coconut, or nuts.
Ingredients
- 1 cup rolled oats
- 1 cup Medjool dates (pitted)
- ½ cup natural peanut butter (or almond butter)
- 2 tablespoons chia seeds
- 1 tablespoon honey or maple syrup
- 1 teaspoon vanilla extract
- ¼ teaspoon sea salt
Optional Add-Ins:
- ¼ cup dark chocolate chips
- ¼ cup shredded coconut
- ¼ cup chopped nuts (almonds, walnuts, or cashews)
- 1 tablespoon cocoa powder (for a chocolatey version)
Instructions
- Soften the Dates: If the dates are dry, soak them in warm water for 10 minutes, then drain.
- Blend the Base: In a food processor, combine oats, dates, peanut butter, chia seeds, honey, vanilla extract, and sea salt. Pulse until the mixture forms a sticky dough.
- Add Mix-Ins: If using chocolate chips, nuts, or coconut, stir them in with a spoon or pulse lightly in the processor.
- Roll into Balls: Scoop out about 1 tablespoon of dough per ball and roll it between your hands to form a round shape.
- Chill for Best Texture: Place the energy balls on a parchment-lined tray and refrigerate for at least 30 minutes before eating.
- Store & Enjoy: Keep them in an airtight container in the fridge for up to a week or freeze for longer storage.
Notes
- Make it Vegan: Use maple syrup instead of honey.
- Nut-Free Option: Substitute peanut butter with sunflower seed butter.
- Keto Version: Replace dates with a sugar-free sweetener and swap oats for almond flour.
- Protein Boost: Add a scoop of protein powder and adjust moisture with extra nut butter if needed.
- Storage Tip: Freeze for up to 3 months and let thaw for a few minutes before eating.
- Prep Time: 10 minutes
- Cook Time: 0 minutes
- Category: Snack
- Method: No-bake
- Cuisine: Healthy, Vegan-Friendly
Why Energy Balls Stand Out from the Crowd
What makes energy balls such a standout snack? It comes down to their smart combination of taste, nutrition, and convenience. Let’s take a closer look:
- Packed with Nutrients – Made with real, whole ingredients like oats, seeds, and nut butters—no artificial fillers here.
- No-Bake Simplicity – Just mix, roll, and chill. No oven needed.
- Perfect for Busy Schedules – Whether you’re heading to work, school, or the gym, they’re the ultimate grab-and-go snack.
- Naturally Sweetened – They get their sweetness from dates, honey, or maple syrup—no refined sugars.
- Adaptable for Every Diet – Whether you’re vegan, gluten-free, or aiming for more protein, these treats can be tailored to fit your goals.
Unlike sugar-packed snack bars that spike your energy and crash you minutes later, energy balls provide steady, sustained fuel. Their balance of healthy fats, protein, and fiber helps keep cravings in check and energy levels consistent.
Wondering are energy balls healthy enough to add to your daily routine? Absolutely—especially when you make them yourself. In the recipe below, we’ll walk you through the best ingredients, step-by-step instructions, and pro tips for making energy balls that taste great and keep you energized. Let’s get rolling
Why This Energy Ball Recipe Will Be Your New Favorite
Energy balls are more than just a health trend—they’re the perfect blend of clean ingredients, quick prep, and satisfying flavor. Whether you’re looking for a pre-workout snack, a better-for-you alternative to sugary treats, or something easy to prep ahead for the week, this recipe checks every box. It’s convenient, nourishing, and absolutely delicious.

Top Benefits of Energy Balls
- Quick and Simple – No baking needed. Just mix, roll, and enjoy!
- Naturally Sweetened – Sweetened with dates, honey, or maple syrup instead of refined sugar.
- Nutrient-Rich – Loaded with fiber, protein, and healthy fats.
- Fully Customizable – Easily swap ingredients to suit your dietary preferences, from vegan to gluten-free.
- Convenient & On-the-Go – Ideal for meal prep, lunchboxes, or a quick snack wherever you are.
A Healthy Alternative to Processed Snacks
A Smarter Choice Than Processed Snack Bars
Are energy balls healthy? When you compare them to most store-bought snacks, the answer is a clear yes. Many packaged bars are filled with preservatives, added sugars, and artificial ingredients that your body doesn’t need. Making your own energy balls at home gives you complete control over what you’re eating—so every bite is made with real, nourishing ingredients.
According to research from the Harvard T.H. Chan School of Public Health, incorporating whole grains, nuts, and seeds into your diet can help stabilize blood sugar and support heart health [source]. These are the very ingredients found in homemade energy balls, making them a naturally well-balanced snack without any of the junk.
A Snack That Fits Every Moment
Energy balls are as versatile as they are delicious—making them a go-to snack for just about any time of day. Loved by kids and adults alike, they’re a tasty way to nourish your body, no matter the setting. Try them as:
- Workout Fuel – Great before or after a workout thanks to their ideal combo of protein and complex carbs.
- A Guilt-Free Treat – Satisfy your sweet tooth with something that actually benefits your body.
- A Healthy Snack for Kids – Easy to eat, fun to make, and filled with nutrients little ones need.
- A Convenient Grab-and-Go Option – Toss a few into your bag for a satisfying snack at school, work, or while traveling.
Whether you’re recharging or simply looking for a feel-good bite, energy balls deliver a naturally sweet and nourishing solution. Up next: the essential ingredients that make these bites both healthy and satisfying!
Ingredients: Simple, Wholesome, and Full of Goodness
Still wondering are energy balls healthy? The answer starts with what goes into them. One of their biggest strengths is how easy they are to make using just a handful of clean, nourishing ingredients. Whether you’re building a snack to fuel your day or satisfy a craving, these building blocks make all the difference.

Essential Ingredients for a Healthy Energy Ball Base
- Rolled Oats – These whole grains offer a hearty texture and are packed with fiber to help you stay full longer.
- Nut Butter – Whether you use peanut, almond, or cashew butter, it adds richness and a good dose of healthy fats.
- Natural Sweeteners – Medjool dates, honey, or pure maple syrup bring natural sweetness without relying on refined sugar.
- Chia or Flaxseeds – Tiny but powerful, these seeds boost the fiber and add beneficial omega-3s.
- Dark Chocolate Chips – A touch of indulgence that adds antioxidants and makes each bite more satisfying.
- Vanilla Extract – Brings warm, aromatic flavor without artificial ingredients.
- Sea Salt – Just a pinch enhances all the other flavors and brings balance.
Fun Extras to Make Them Your Own
These extras are a great way to boost taste, add variety, and enhance nutritional value:
- Coconut Flakes – Add a chewy texture and a subtle tropical twist.
- Protein Powder – A smart addition if you’re looking to increase your protein intake, especially for post-workout recovery.
- Dried Fruit – Include chopped apricots, cranberries, or raisins for a natural burst of sweetness.
- Crushed Nuts – Almonds, walnuts, or pecans add a satisfying crunch and additional nutrients.
- Cocoa Powder – Perfect if you love chocolate flavor but want to skip the extra sugar.
Easy Ingredient Swaps for Every Diet
Energy balls are incredibly flexible and can easily be adapted to match your dietary needs:
- Gluten-Free – Use oats labeled gluten-free to keep the recipe safe for those with gluten sensitivity.
- Vegan – Replace honey with maple syrup and use dairy-free chocolate chips for a fully plant-based version.
- Low-Carb/Keto – Swap oats with almond flour or shredded coconut, and choose a sugar-free sweetener that fits your plan.
By choosing quality ingredients, you’re not just making a snack—you’re building something that supports your energy, satisfies your hunger, and tastes amazing too. Ready to start rolling? Let’s walk through the step-by-step process next
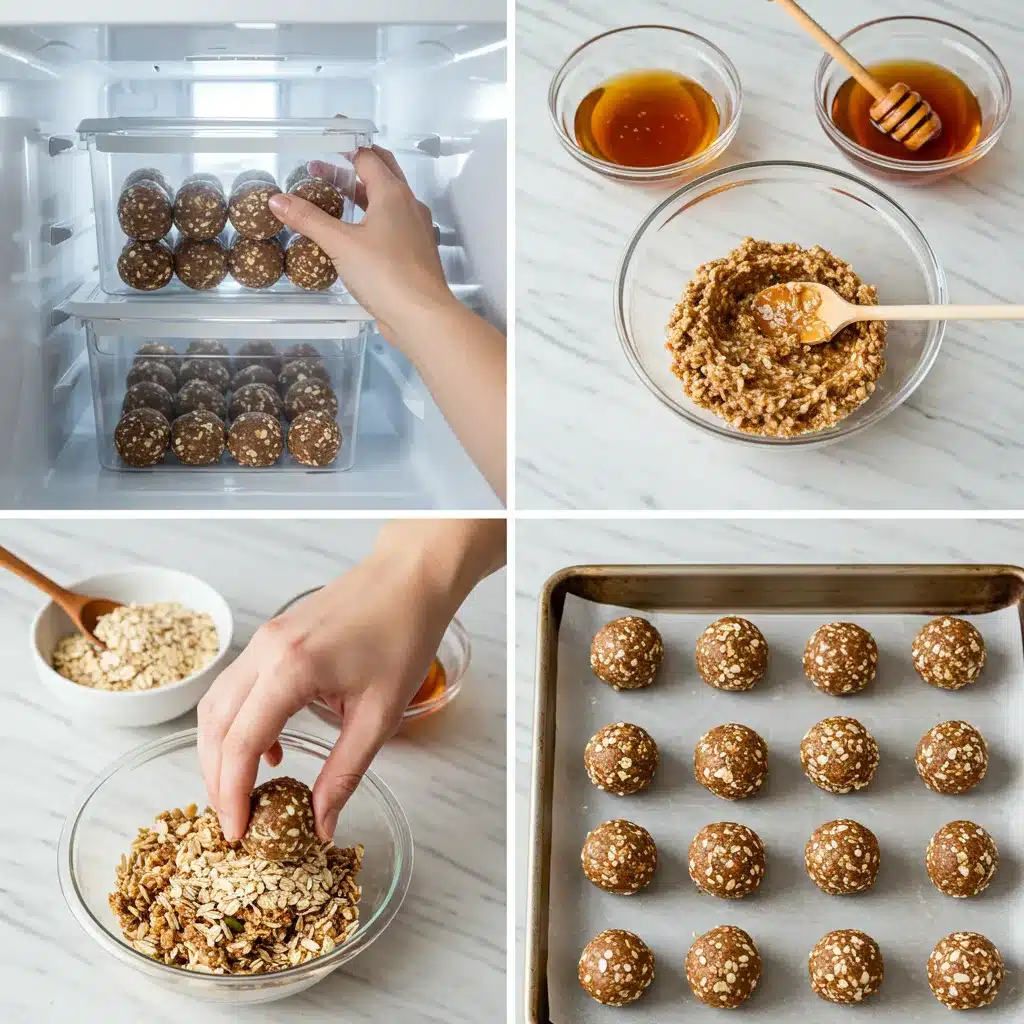
Step-by-Step Instructions: How to Make No-Bake Energy Balls
Making your own energy balls at home is fast, fun, and foolproof. With a few simple ingredients and no need for baking, you’ll have a batch of healthy snacks ready in no time. Follow this step-by-step guide to get started.

1. Prep Your Ingredients
Begin by gathering everything you need. If you’re working with Medjool dates, soak them in warm water for about 10 minutes to soften—this helps create a smoother blend and a stickier dough base.
2. Blend the Base
Place the rolled oats, softened dates (or other sweetener), and nut butter into a food processor.
Blend until the mixture forms a dense, sticky dough. If it seems too dry, add a splash of water or a bit more nut butter to reach the right consistency.
3. Add Your Favorite Mix-Ins
Transfer the dough to a bowl, then stir in your chosen extras—like chocolate chips, seeds, coconut, or nuts. Stir well until all the ingredients are evenly incorporated throughout the mixture.
4. Shape Into Balls
Scoop out the dough in tablespoon-sized portions and roll each one between your palms to form smooth, round bites. If the mixture sticks to your hands, lightly coat them with water or a small amount of oil.
5. Chill to Set
Arrange the rolled balls on a parchment-lined tray or plate, then refrigerate for at least 30 minutes. This helps them firm up and deepens the flavor.
6. Store and Serve
After chilling, they’re ready to eat whenever you need a quick energy boost. Keep them stored in an airtight container in the fridge for up to one week, or freeze for longer freshness.
Homemade energy balls are a breeze to put together, endlessly adaptable to your tastes, and a great option for prepping healthy snacks in advance. Coming up next: creative flavor ideas and tips to make your energy balls even better!
Expert Tips and Creative Twists to Upgrade Your Energy Balls
One of the best things about making energy balls is how easy it is to customize them. Whether you’re looking to increase protein, keep things nut-free, or simply switch up the flavors, there are plenty of ways to tailor your recipe to your needs and taste.
Smart Tips for Better Results Every Time
- Chill the Dough First – If the mixture feels too sticky, place it in the fridge for 10–15 minutes before rolling. It’ll be much easier to handle.
- Use a Food Processor – Blending oats and dates gives you a smoother consistency. Want a chunkier bite? Just pulse instead of fully blending.
- Adjust the Texture – Too dry? Add a bit of extra nut butter or a splash of warm water to help bring the mixture together.. Too wet? Stir in a bit of oat flour or ground flaxseed.
- Keep Your Hands Clean – Lightly coat your palms with a bit of coconut oil or water to keep the mixture from sticking while shaping.
- Keep Them Fresh – Store your energy balls in a sealed container in the refrigerator for up to a week, or pop them in the freezer for up to three months for long-term snacking.
Fun and Flavorful Variations to Try
- Protein-Packed Power Balls – Mix in a scoop of your favorite protein powder to create a post-workout snack that fuels recovery.
- Nut-Free Version – Use sunflower seed butter or tahini for a school-safe option that’s free from common allergens.
- For Chocolate Lovers – Blend in unsweetened cocoa powder and a handful of dark chocolate chips for a decadent treat that still keeps things wholesome.
- Tropical Twist – Mix in shredded coconut and bits of dried pineapple for a sweet, sunny flavor that brings a taste of the islands to every bite.
- Superfood-Infused Bites – Boost the benefits by adding hemp seeds, maca powder, or a pinch of spirulina for extra nutrients.
- Low-Carb Option – Ditch the oats and use almond flour or shredded coconut, along with a sugar-free sweetener like monk fruit or stevia.
Experimenting with ingredients is part of the fun. Whether you prefer chewy, crunchy, rich, or refreshing, you can fine-tune your energy balls to suit any craving or dietary goal.
Up next, we’ll show you the best ways to serve and store your homemade energy balls to keep them fresh and delicious!
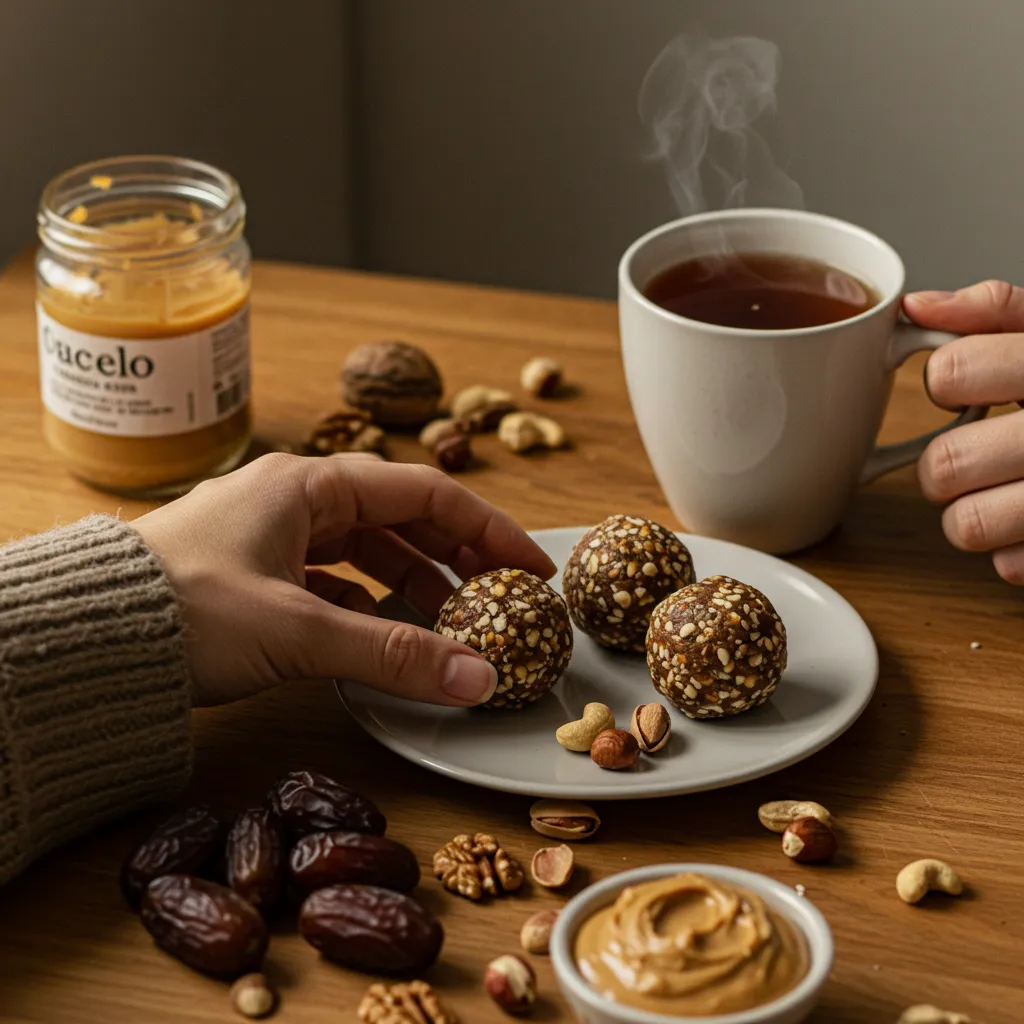
How to Enjoy Energy Balls Anytime, Anywhere
Energy balls are more than just a healthy snack—they’re versatile, delicious, and perfect for just about any moment in your day. Whether you’re at home, on the move, or building a balanced meal, these creative serving ideas will help you get the most out of every bite.
Smart Ways to Serve Energy Balls
- On the Go – Stash a few in your bag or lunchbox for a quick, energizing bite during your busiest moments.
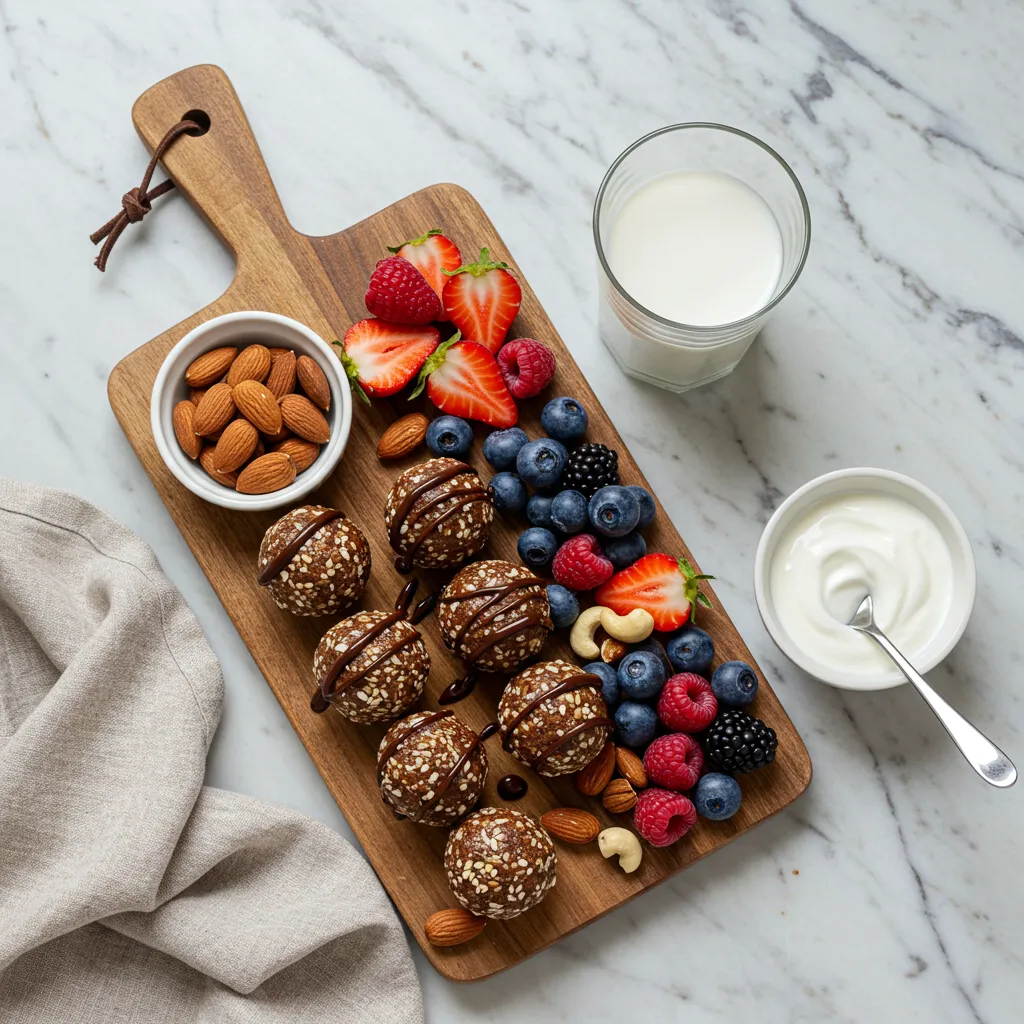
- At Breakfast – Pair them with Greek yogurt, fresh fruit, or a smoothie bowl for a well-rounded, nutrient-rich morning meal.
- Workout Fuel – With their natural balance of carbs, protein, and healthy fats, energy balls make a great pre- or post-exercise snack.
- Guilt-Free Dessert – Craving something sweet? These bites offer a satisfying alternative to cookies or candy without the sugar crash.
- Kid-Approved Treat – Their fun size and natural sweetness make them perfect for children’s lunchboxes or after-school snacks.
Easy Presentation Tips to Elevate the Look
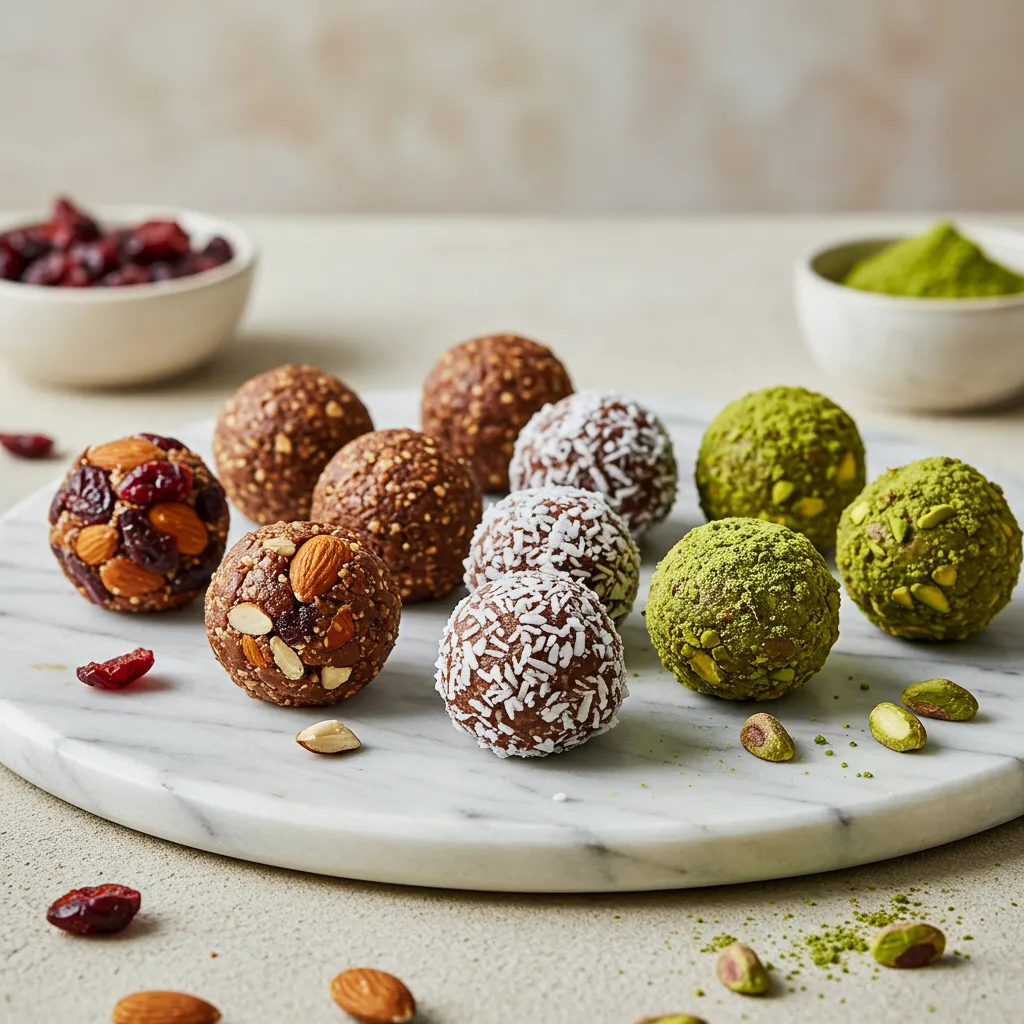
- Add a Coating – Roll your finished balls in shredded coconut, chopped nuts, or cocoa powder to boost flavor and texture.
- Serve with Style – Arrange them on a serving board with berries and dark chocolate chunks for a beautiful snack spread.
- Chocolate Drizzle – For a touch of decadence, melt a bit of dark chocolate and lightly drizzle it over the top of your energy balls.
How to Store for Lasting Freshness
- Refrigerate – Store your energy balls in an airtight container in the fridge. They’ll remain fresh in the fridge for about seven days.
- Freeze for Later – Want to prep ahead? Freeze them in a sealed container for up to three months. Simply allow them to sit at room temperature for a few minutes before enjoying.
- Great for Meal Prep – Make a larger batch and divide between the fridge and freezer so you always have a healthy snack on hand.
Whether you’re wondering are energy balls healthy enough to be a daily habit or just looking for a new snack idea, these little bites check all the boxes: nutritious, tasty, and endlessly flexible.
Ready for the final recap and expert tips to bring it all together? Let’s finish strong!
Conclusion: A Snack Worth Trying
If you’ve been wondering are energy balls healthy, now you know—they absolutely are! With their mix of nourishing ingredients, no-bake ease, and versatile flavors, energy balls are the kind of snack that checks every box. They’re quick to prep, easy to store, and perfect for everything from post-workout fuel to sweet tooth satisfaction.
Why You’ll Keep Coming Back to This Recipe:
- Made with wholesome, real-food ingredients
- Naturally sweet—no refined sugar needed
- Easy to adjust for dietary needs or flavor preferences
- Great for prepping ahead and enjoying on the go
What About You?
Do you make your own energy balls? What ingredients do you love to include—crunchy nuts, dried fruit, or a sprinkle of cocoa? Share your favorite mix-ins in the comments below! If you found this guide helpful, don’t forget to save it or pass it along to someone looking for simple, healthy snack ideas.
Looking for more inspiration in the kitchen? Explore these reader favorites:
- Porcupine Soup: A Hearty and Comforting Dish
- What is Cobb Salad Made Of?
- The Ultimate Guide to Making and Using Fajita Sauce
- Steamed Chicken with Vegetables
- Are Energy Balls Healthy?
Here’s to enjoying more delicious moments, one healthy bite at a time!
FAQs: Answering Your Questions About Energy Balls
Energy balls are a go-to snack for many, but it’s normal to have a few questions before getting started. Below are answers to some of the most common things people ask when making them at home.
1. Is It Possible to Make Energy Balls Without a Food Processor?
Not at all! While a food processor makes blending easier, you can still make energy balls without one. Simply chop your dates as finely as possible and mix the ingredients in a large bowl. Add a bit of nut butter and warm water to help everything stick together.
2. How Long Will Energy Balls Stay Fresh?
Store your energy balls in an airtight container in the refrigerator to keep them fresh for up to seven days. Want them to last longer? Freeze them for up to three months and let them thaw at room temperature before serving.
3. Can I Use a Different Sweetener Besides Dates?
Yes! Dates are a popular choice, but you can swap in honey, maple syrup, or even mashed banana. Just keep an eye on the texture—if your mixture becomes too wet, add more oats or ground seeds to balance it out.
4. What Add-Ins Can Boost the Nutrition?
You can boost both flavor and nutrients with these popular add-ins:
- Chia or flaxseeds – Boost the fiber content and provide a natural source of omega-3 fatty acids.
- Protein powder – to make them more filling, especially after workouts
- Coconut flakes or cacao nibs – for added texture and flavor without refined sugar
5. How Can I Fix a Mixture That’s Too Sticky?
If the mixture feels too sticky to handle, add a bit more oats, almond flour, or ground flaxseed to firm it up and make rolling easier. You can also chill the mixture in the fridge for 10–15 minutes before rolling—it makes shaping much easier.
Wowwwwww !
Sounds interesting….