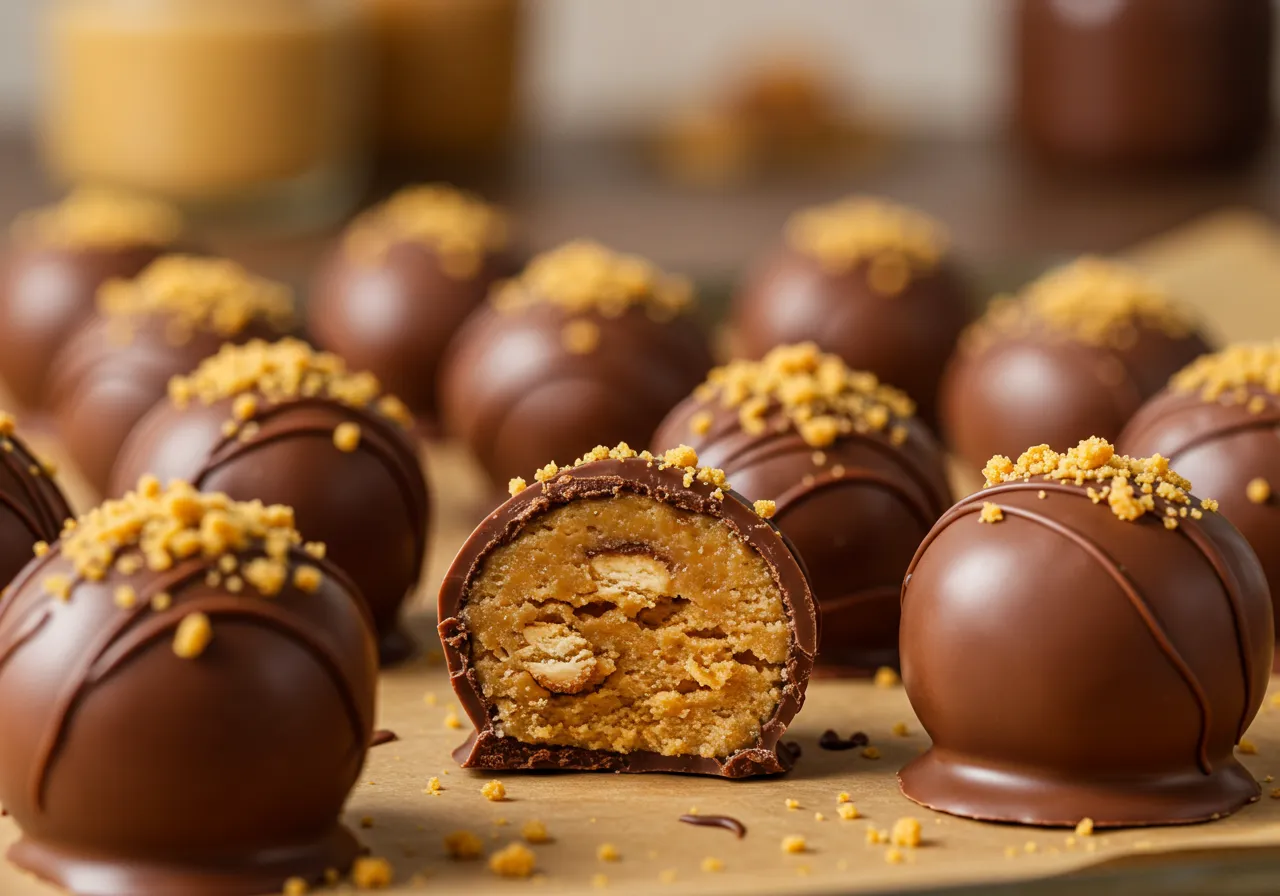
If you love the crispy, peanut-buttery crunch of Butterfinger candy bars, this Butterfinger Balls recipe will be your new favorite treat. These no-bake chocolate-dipped bites are quick to prepare and packed with flavor. Perfect for holiday platters, party desserts, or a simple sweet snack, they deliver a rich, melt-in-your-mouth experience with just the right amount of crunch.
This recipe requires only a few simple ingredients and no oven time, making it an easy dessert option for busy days. With a creamy peanut butter base, crushed Butterfinger pieces, and a smooth chocolate coating, every bite is irresistibly good. Whether you’re making them for yourself or sharing with friends and family, these treats are sure to impress.
Ready to make your own Butterfinger Balls? Let’s get started with the key ingredients you’ll need.
Print
Butterfinger Balls Recipe
- Total Time: 45 minutes
- Yield: 24 balls
- Diet: Vegetarian
Description
These Butterfinger Balls are a delicious no-bake dessert featuring a creamy peanut butter filling mixed with crushed Butterfinger candy and coated in smooth milk chocolate. Perfect for parties, holiday treats, or gifting, these bite-sized delights combine the rich flavor of chocolate with the crispy, peanut-buttery goodness of Butterfinger bars. They’re quick, easy, and require no oven time, making them a great choice for busy schedules.
Ingredients
For the Filling:
- 1 cup Butterfinger candy bars, crushed (about 3 full-size bars)
- ¾ cup creamy peanut butter
- ¼ cup unsalted butter, softened
- 1 ½ cups powdered sugar
- ½ teaspoon vanilla extract
- ¼ teaspoon sea salt
For the Chocolate Coating:
- 12 oz milk chocolate chips (or melting wafers)
- 1 teaspoon coconut oil (optional, for smoother coating)
Instructions
Step 1: Prepare the Filling
- Crush the Butterfinger candy bars using a food processor or place them in a zip-top bag and crush them with a rolling pin.
- In a mixing bowl, combine peanut butter, softened butter, powdered sugar, vanilla extract, and salt. Stir until smooth.
- Fold in the crushed Butterfinger pieces, mixing until well incorporated.
Step 2: Shape the Balls
- Line a baking sheet with parchment paper.
- Roll the mixture into 1-inch balls and place them on the baking sheet.
- Refrigerate for 30 minutes to firm up before dipping in chocolate.
Step 3: Melt the Chocolate
- In a microwave-safe bowl, melt the chocolate chips in 20-second intervals, stirring between each, until smooth.
- Stir in coconut oil if using, to create a thinner, easier-to-coat consistency.
Step 4: Coat the Butterfinger Balls
- Using a fork or dipping tool, dip each chilled Butterfinger Ball into the melted chocolate, ensuring an even coating.
- Allow excess chocolate to drip off, then place the coated balls back onto the parchment-lined tray.
Step 5: Set and Serve
- Let the chocolate set at room temperature or refrigerate for 15 minutes until firm.
- Store in an airtight container in the refrigerator for up to 1 week, or freeze for up to 3 months.
Notes
- For a crunchier texture, leave some larger chunks of Butterfinger in the filling.
- Dark or white chocolate can be used instead of milk chocolate for variety.
- To make it nut-free, substitute peanut butter with sunflower seed butter or cookie butter.
- If chocolate thickens while dipping, reheat briefly or stir in a few drops of coconut oil.
- Prep Time: 15 minutes
- Cook Time: 30 minutes
- Category: Dessert
- Method: No-Bake
- Cuisine: American
Key Ingredients for Butterfinger Balls Recipe
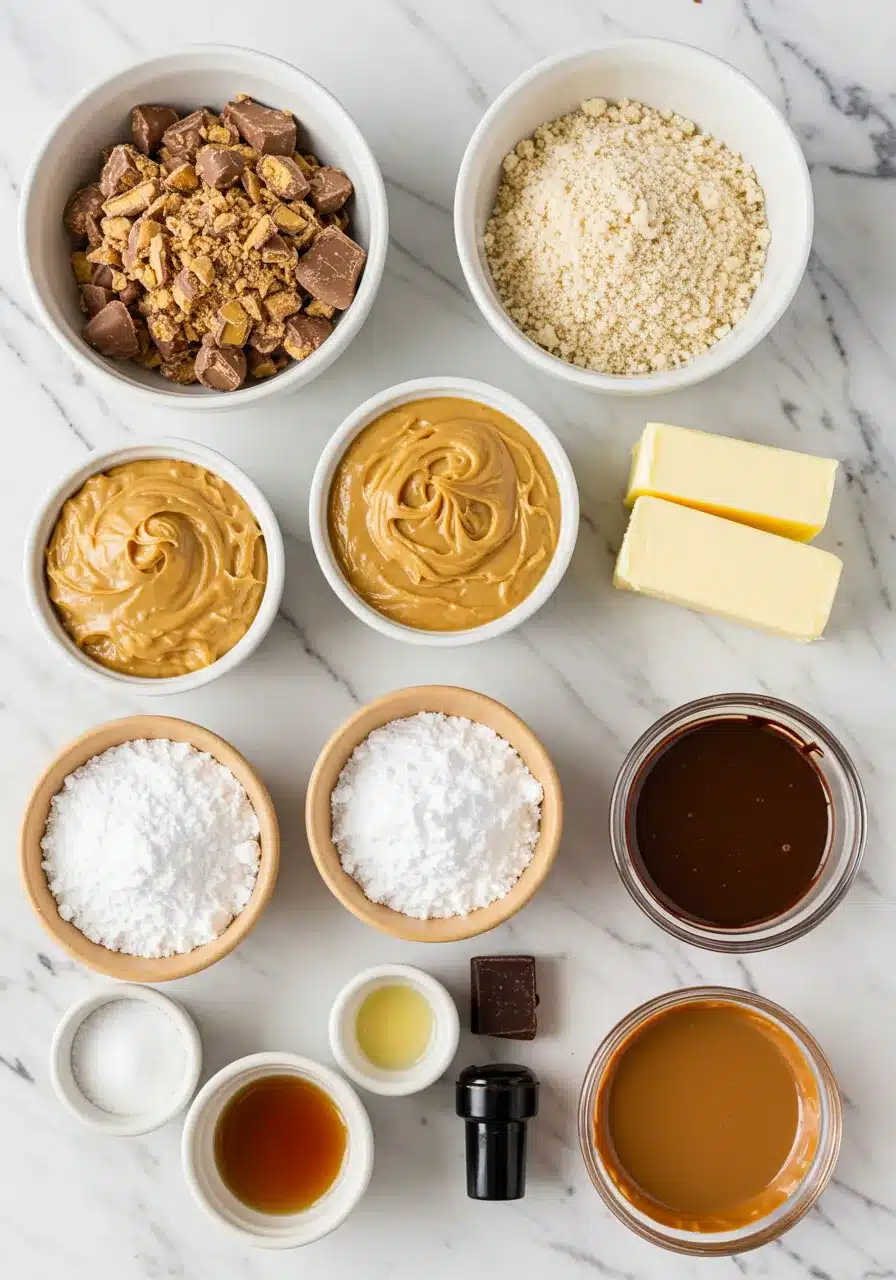
Making Butterfinger Balls at home requires just a handful of simple ingredients. Each one plays an important role in creating the perfect balance of crunch, creaminess, and rich chocolate flavor. Here’s what you’ll need:
Essential Ingredients
- Butterfinger candy bars (crushed) – The key ingredient that gives these treats their signature crispy texture and caramelized peanut butter flavor. Crush them finely for a smoother consistency or leave small chunks for extra crunch.
- Peanut butter – A creamy base that binds everything together. Smooth peanut butter works best, but crunchy peanut butter can add extra texture.
- Powdered sugar – Helps absorb excess moisture and gives the filling a soft, melt-in-your-mouth consistency.
- Butter (softened) – Adds richness and helps create a firm, yet creamy mixture that holds its shape.
- Vanilla extract: Adds a warm, subtle sweetness that enhances the overall flavor.
- Chocolate (melting wafers or chocolate chips) – A smooth, glossy chocolate coating brings everything together. Milk chocolate complements the Butterfinger flavor best, but dark or white chocolate can be used for variation.
- Coconut oil (optional) – Helps thin the chocolate for easier coating and a silky finish.
Ingredient Tips and Substitutions
- For a stronger peanut butter flavor, add a tablespoon of peanut butter powder to the mixture.
- If you prefer a softer texture, increase the butter slightly or mix in a small amount of heavy cream.
- To make it nut-free, try using sunflower seed butter or cookie butter as a substitute.
- For a crunchier texture, stir in some crushed graham crackers or rice cereal.
With these simple ingredients, you’re just a few steps away from making an irresistible batch of Butterfinger Balls. Up next, let’s go through the step-by-step process to bring them to life.
Step-by-Step Instructions for Butterfinger Balls Recipe
Making Butterfinger Balls is a simple and rewarding process. With just a few easy steps, you’ll have a batch of rich, chocolate-coated treats ready to enjoy. Follow this guide for the best results.
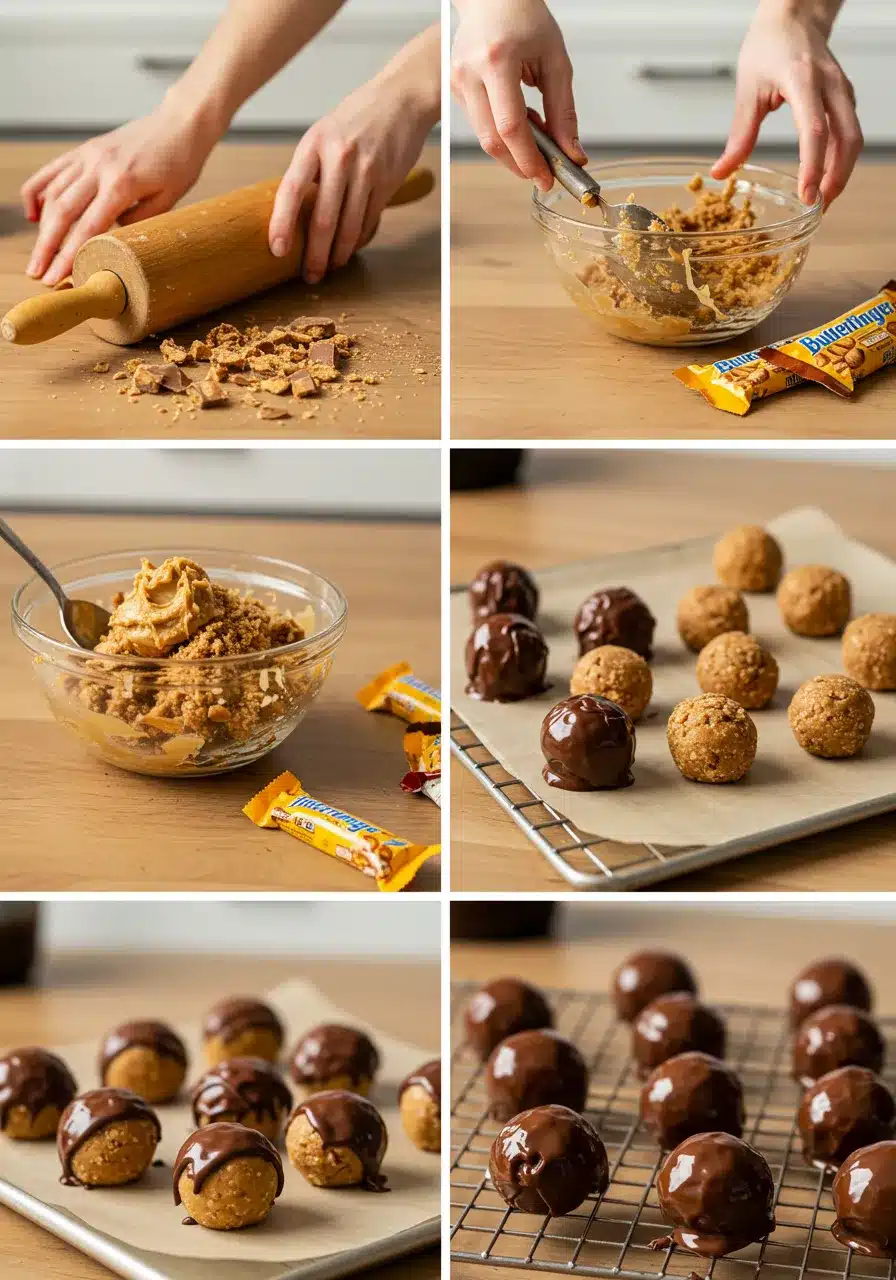
1. Prepare the Butterfinger Mixture
- Crush the Butterfinger candy bars into fine crumbs using a food processor or by placing them in a sealed bag and crushing them with a rolling pin. Set aside.
- In a mixing bowl, combine the peanut butter, softened butter, powdered sugar, and vanilla extract. Stir until smooth and well blended.
- Fold in the crushed Butterfinger pieces, making sure they are evenly distributed throughout the mixture.
2. Shape the Balls
- Line a baking sheet with parchment paper.
- Using a small cookie scoop or a spoon, scoop out portions of the mixture and roll them into bite-sized balls.
- Place the balls onto the prepared baking sheet, ensuring they are evenly spaced.
- Transfer the tray to the refrigerator and chill for at least 30 minutes. This helps them firm up for easy dipping.
3. Melt the Chocolate
- In a microwave-safe bowl, melt the chocolate chips or melting wafers in 20-second intervals, stirring in between each round until smooth.
- If using, stir in a small amount of coconut oil to create a thinner, more even coating.
4. Coat the Butterfinger Balls
- Using a fork or dipping tool, lower each chilled ball into the melted chocolate, ensuring it is fully coated.
- Lift the ball out, allowing any excess chocolate to drip off, then place it back on the parchment-lined tray.
- Repeat until all balls are coated.
5. Set and Serve
- Let the chocolate harden at room temperature, or place the tray in the refrigerator for faster setting.
- Once set, place the Butterfinger Balls in an airtight container for storage.
- Enjoy immediately, or store them in the fridge for up to a week.
Now that your Butterfinger Balls are ready, let’s explore some of the best ways to serve and enjoy them.
What to Serve with this recipe
Butterfinger Balls are rich, chocolatey, and packed with peanut butter flavor. They’re delicious on their own, but pairing them with the right treats can enhance their taste and make them even more enjoyable. Whether you’re serving them at a party, giving them as gifts, or enjoying them with a cup of coffee, here are some great ideas.
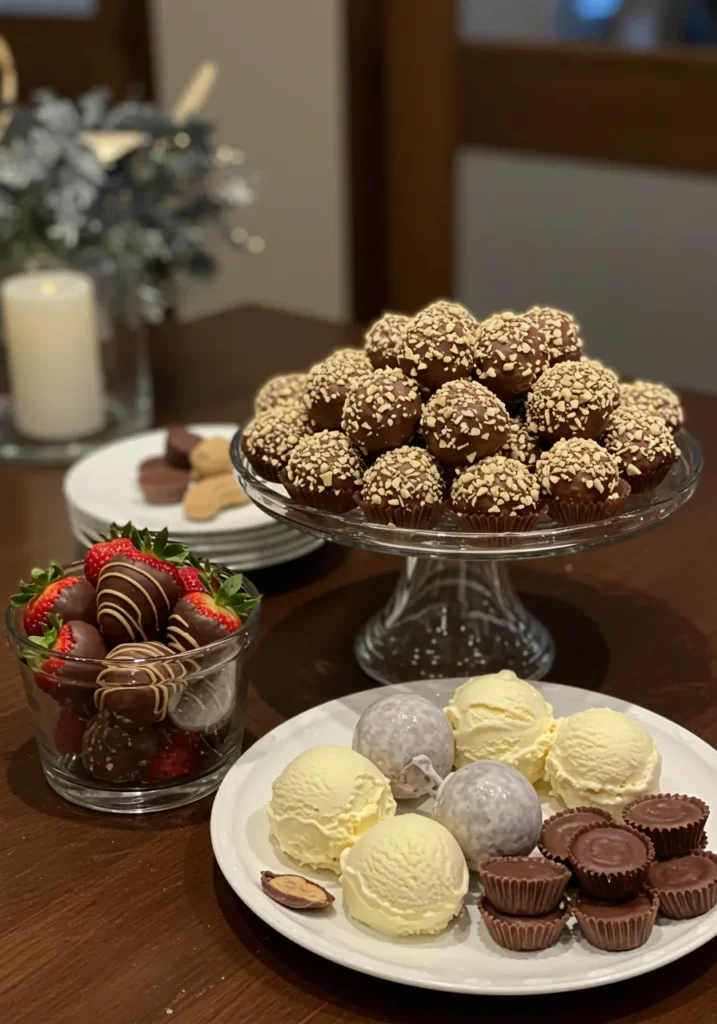
Pairing Ideas for Butterfinger Balls
- With Coffee or Hot Chocolate – The creamy peanut butter and crispy Butterfinger pieces complement the deep flavors of a hot cup of coffee or a rich hot chocolate.
- Alongside Ice Cream – Serve Butterfinger Balls with vanilla, chocolate, or peanut butter ice cream for a decadent dessert combination.
- On a Dessert Platter – Arrange them with other no-bake treats like peanut butter cups, chocolate truffles, and fudge for a visually appealing and flavorful dessert spread.
- With Fresh Fruit – The sweetness of Butterfinger Balls pairs well with sliced strawberries, bananas, or apples for a balanced bite.
- Crumbled Over Yogurt – Chop a few Butterfinger Balls and sprinkle them over Greek yogurt for an indulgent yet satisfying snack.
Perfect Occasions for Serving
- Holiday Parties – Add them to holiday cookie trays or dessert buffets for a festive treat.
- Gifting – Pack them in decorative boxes or bags as homemade gifts for friends and family.
- Potlucks and Gatherings – Easy to transport and share, these bite-sized treats are always a crowd favorite.
- Movie Nights – Pair them with popcorn and other snacks for a sweet and salty mix.
No matter how you serve them, Butterfinger Balls are sure to be a hit. Next, let’s go over some expert tips to make them even better.
Top Tips for Perfecting this Recipe
Creating the perfect Butterfinger Balls is all about technique, ingredient balance, and proper storage. These tips will help you achieve the best texture, flavor, and presentation every time.
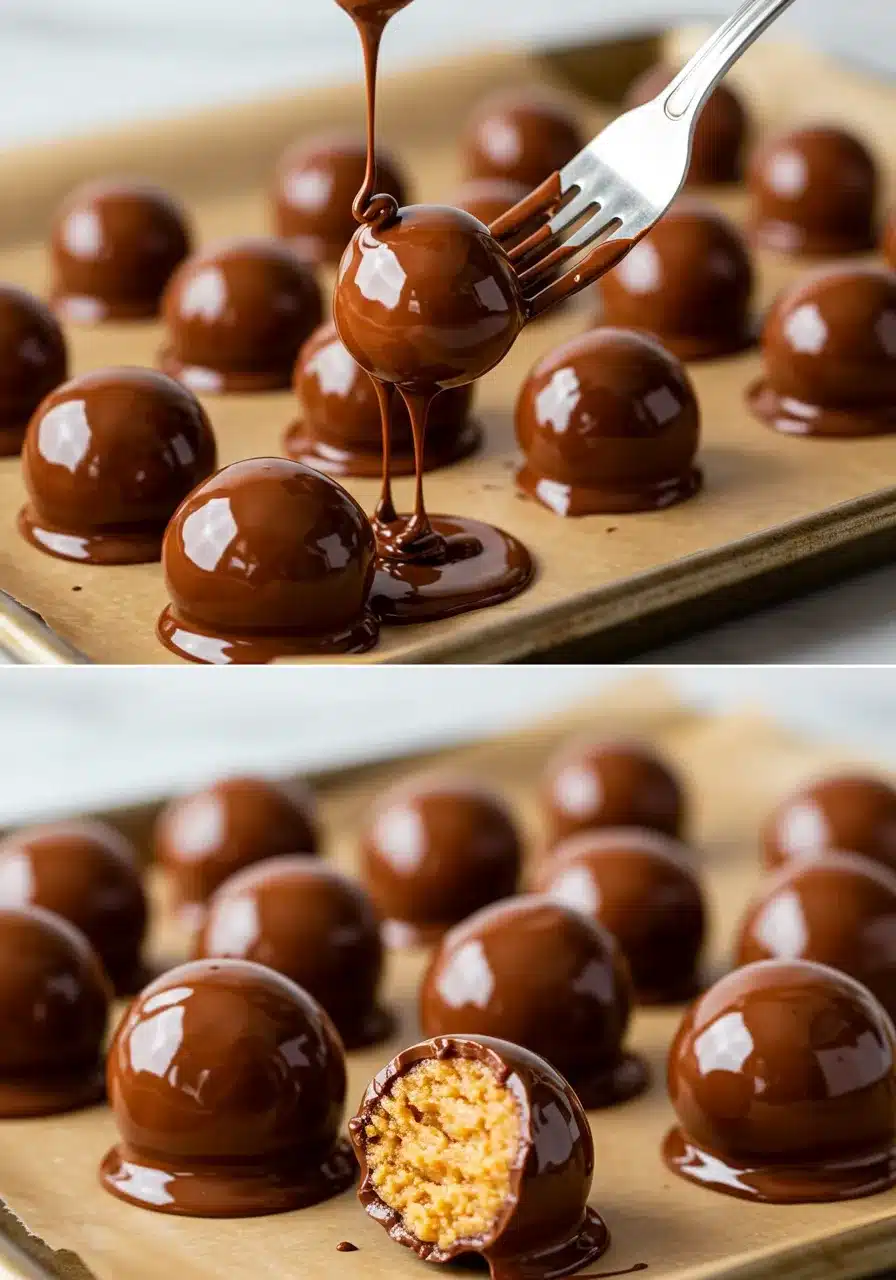
1. Choose the Right Ingredients
- Use fresh Butterfinger Balls Recipe candy bars for the crispiest texture. Stale bars can lose their signature crunch.
- Stick to smooth peanut butter for a creamy, well-blended mixture. Natural peanut butter with excess oil separation may cause inconsistencies.
- Opt for high-quality melting chocolate or chocolate chips designed for dipping. This ensures a smooth, glossy coating that won’t crack.
2. Crush Butterfingers to the Ideal Consistency
- A food processor creates fine crumbs for a uniform texture.
- For a chunkier bite, crush the bars using a rolling pin inside a sealed plastic bag.
- Mixing finer crumbs with small chunks provides the best combination of crunch and smoothness.
3. Chill the Mixture Before Dipping
- Refrigerate the shaped balls for at least 30 minutes before coating. This prevents them from falling apart when dipped in chocolate.
- For quicker setting, freeze for 10–15 minutes, but avoid letting them become too hard, or the chocolate may crack.
4. Melt Chocolate Properly for a Smooth Finish
- If using a microwave, melt chocolate in 20-second intervals, stirring frequently to prevent burning.
- A double boiler is the best method for even melting and temperature control.
- Adding ½ teaspoon of coconut oil to the melted chocolate creates a thinner, easier-to-work-with consistency.
5. Dip and Coat for a Professional Look
- Use a fork or dipping tool to submerge each ball, letting excess chocolate drip off before placing it on parchment paper.
- If the chocolate thickens while working, reheat briefly or stir in a few drops of coconut oil.
- For extra decoration, drizzle melted white chocolate over the set Butterfinger Balls.
6. Store Properly for Freshness
- Keep in an airtight container in the refrigerator for up to one week to maintain freshness.
- For longer storage, freeze Butterfinger Balls in a sealed container for up to three months. Let thaw for a few minutes before serving.
- To prevent them from sticking, separate layers with parchment paper.
By following these tips, you’ll create Butterfinger Balls that are perfectly creamy, crunchy, and coated in smooth chocolate. Up next, let’s wrap up with some final thoughts on why this recipe is a must-try.
Conclusion
Butterfinger Balls Recipe are a simple yet indulgent treat that combines creamy peanut butter, crunchy Butterfinger pieces, and a smooth chocolate coating. Whether you’re making them for a holiday party, a quick snack, or a homemade gift, this recipe is guaranteed to impress. With just a few ingredients and no baking required, these bite-sized desserts are easy to prepare and perfect for any occasion.
If you enjoyed this recipe, you might also love trying other creative no-bake desserts. For a comforting meal, consider making Porcupine Soup, a hearty dish packed with flavor. Looking for a nutritious option? The Purple Black Bean Soup Recipe offers a rich and wholesome taste.
For a bold and spicy twist, try the Taco Soup Frios Recipe, perfect for warming up on chilly days. If you’re craving something more traditional, the Taipei Cuisine Quincy Beef Noodle Soup delivers deep, savory flavors. Adventurous eaters might also enjoy the Beef Kidney Recipe, a unique dish with a rich taste.
No matter how you serve them, these Butterfinger Balls are sure to become a favorite. Try this recipe today and let us know how you enjoyed them!
FAQs
Got questions about making Butterfinger Balls? Here are the most common concerns and expert answers to help you perfect this recipe.
1. Can I substitute crunchy peanut butter for smooth?
Yes, you can use crunchy peanut butter if you prefer a bit more texture in the filling. However, smooth peanut butter blends better with the crushed Butterfinger pieces for a more even consistency.
2. How do I crush Butterfinger bars without a food processor?
If you don’t have a food processor, place the Butterfinger bars in a sealed plastic bag and crush them with a rolling pin. You can also use the back of a spoon or a mortar and pestle for finer crumbs.
3. What type of chocolate works best for coating?
Milk chocolate pairs perfectly with the Butterfinger flavor, but dark chocolate can add a richer taste. White chocolate is also a great option for variety. Use melting wafers or high-quality chocolate chips for the smoothest coating.
4. Why is my chocolate coating too thick?
If your melted chocolate is too thick, stir in a small amount of coconut oil or vegetable shortening to thin it out. Avoid introducing water, as it may cause the chocolate to seize and become grainy.
5. Can I make these ahead of time?
Yes! Butterfinger Balls can be prepared ahead of time and kept in an airtight container in the refrigerator for up to one week. For longer storage, freeze them for up to three months and thaw at room temperature before serving.
By following these tips, you’ll master the Butterfinger Balls recipe with ease. Have more questions? Leave a comment and share your experience!

Nice recipe, Thanks